Tutorial 3: Create and Share a Video
There is no doubt that the time-lapse you have created is beyond awesome! You'd better turn it into a video and share it with your friends! For the purposes of this tutorial we will use the project we created in Tutorial 1: Time-Lapse - Union Square.
PLEASE NOTE: Rendering video is an extremely resource intensive task for your device and it requires that the OSnap! not be interrupted by phone calls or other system notifications during the process; your safest bet is to place your device in 'Airplane Mode' during long export sessions.
Step 1: Create Video
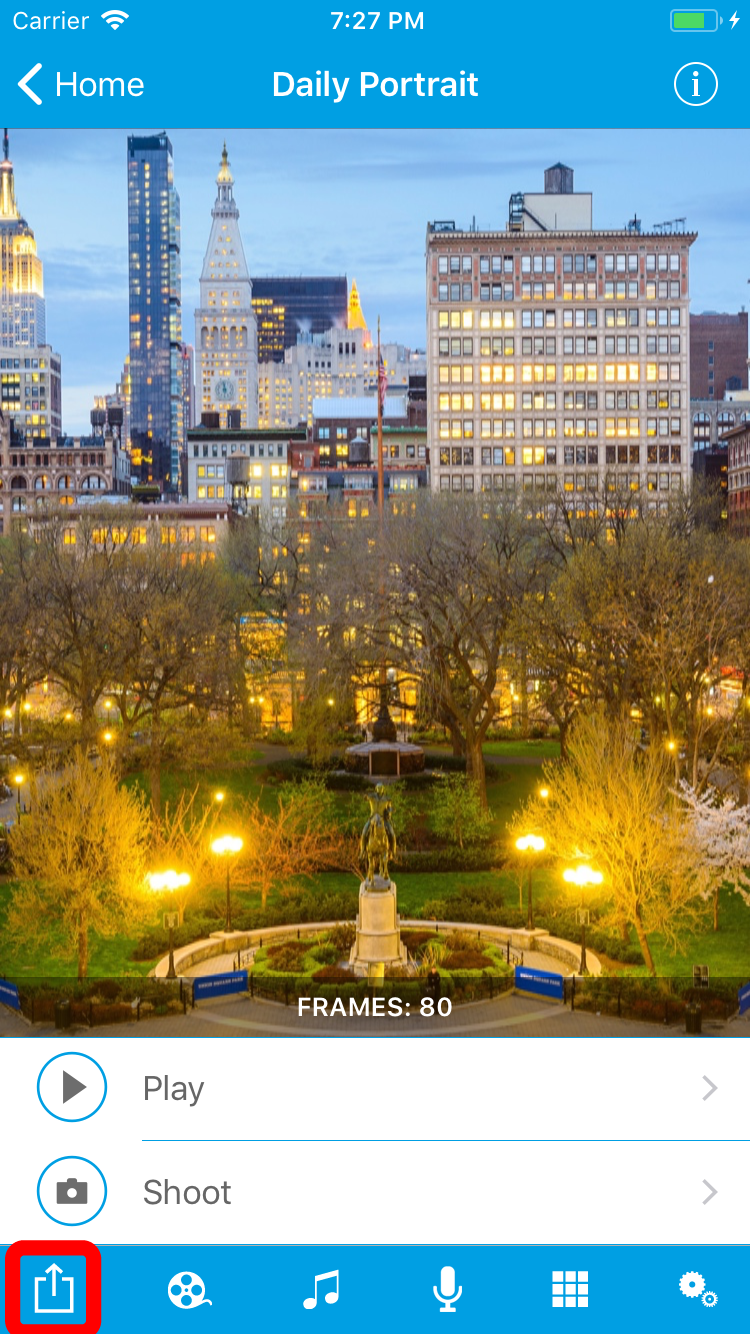
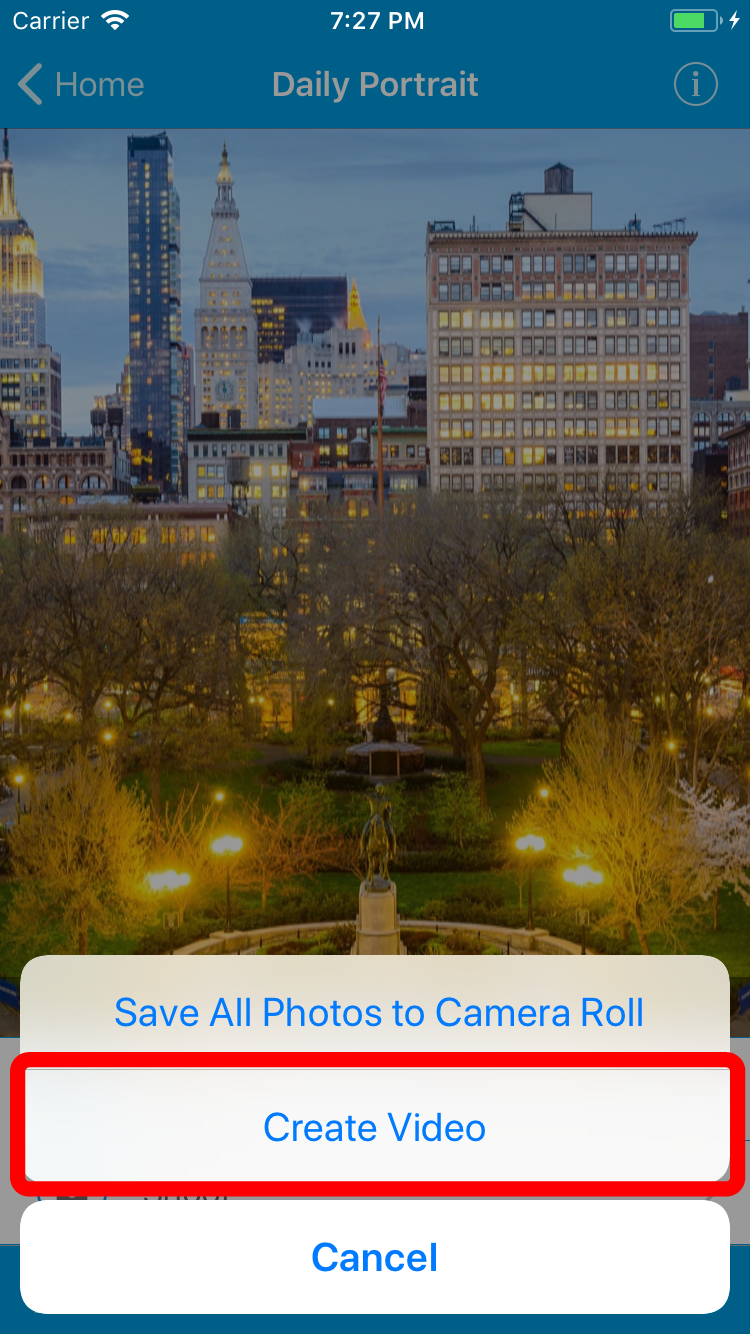
- Navigate to the Project Summary screen for the project you would like to use to create a video. Tap the 'Export/Action' button on the toolbar. A menu appears. From the menu choose 'Create Video'
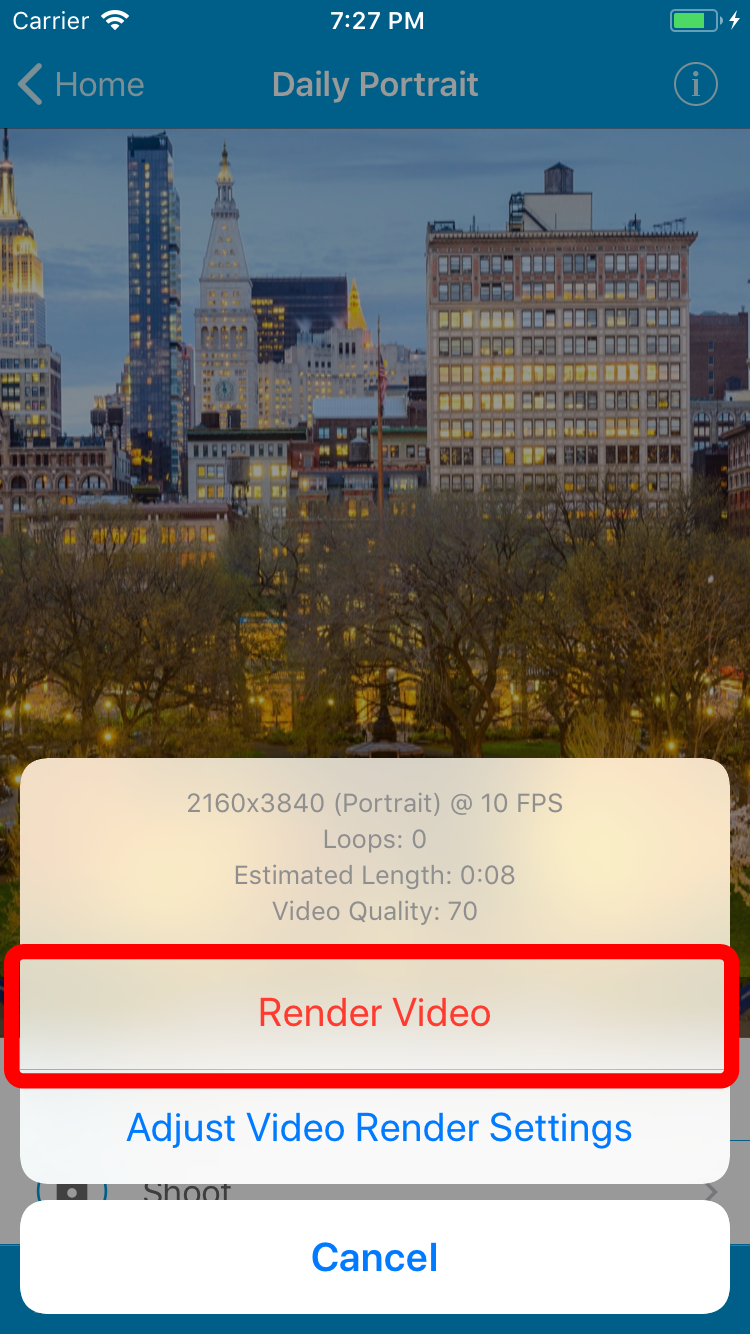
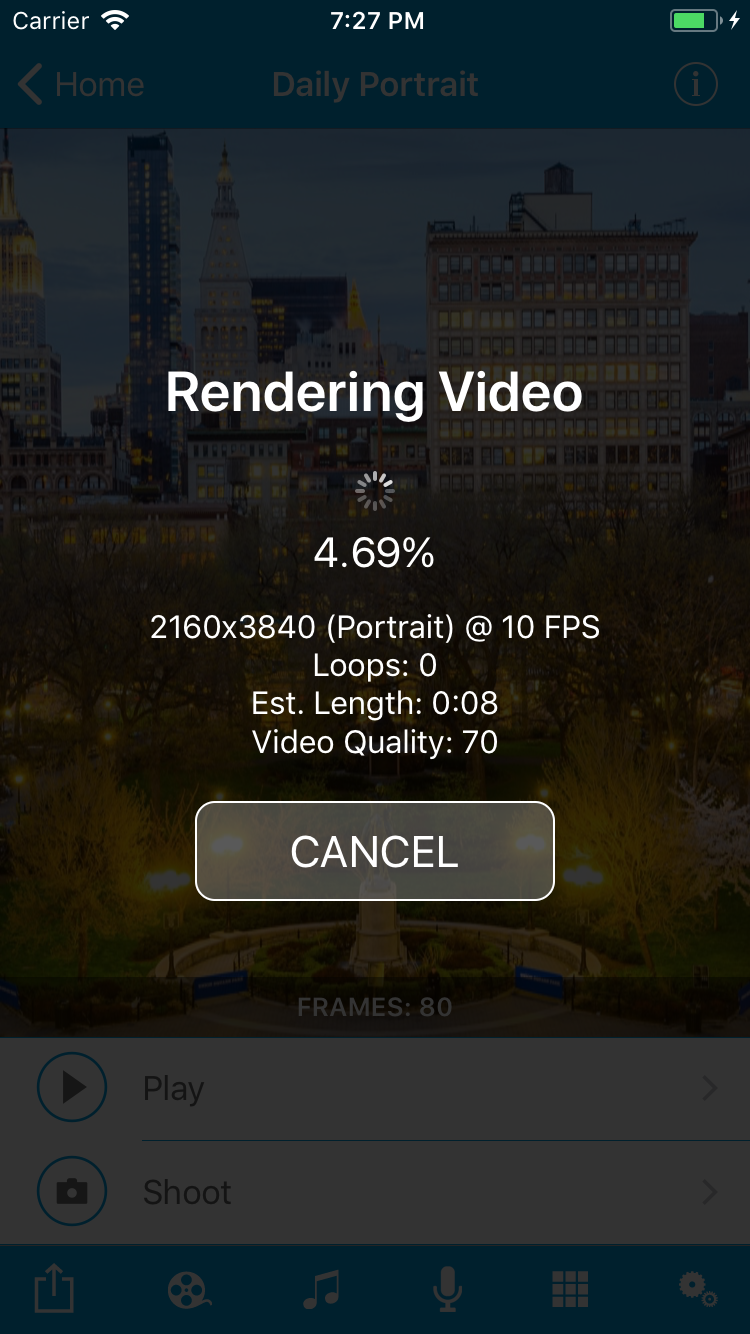
- Another menu appears. Choose 'Begin Video Export'. OSnap! will now begin rendering a Quicktime video; depending on how many photos you have taken it could take a little time for rendering to complete. TIP: Exported video resolution is always dictated by the FIRST image in the time-lapse sequence
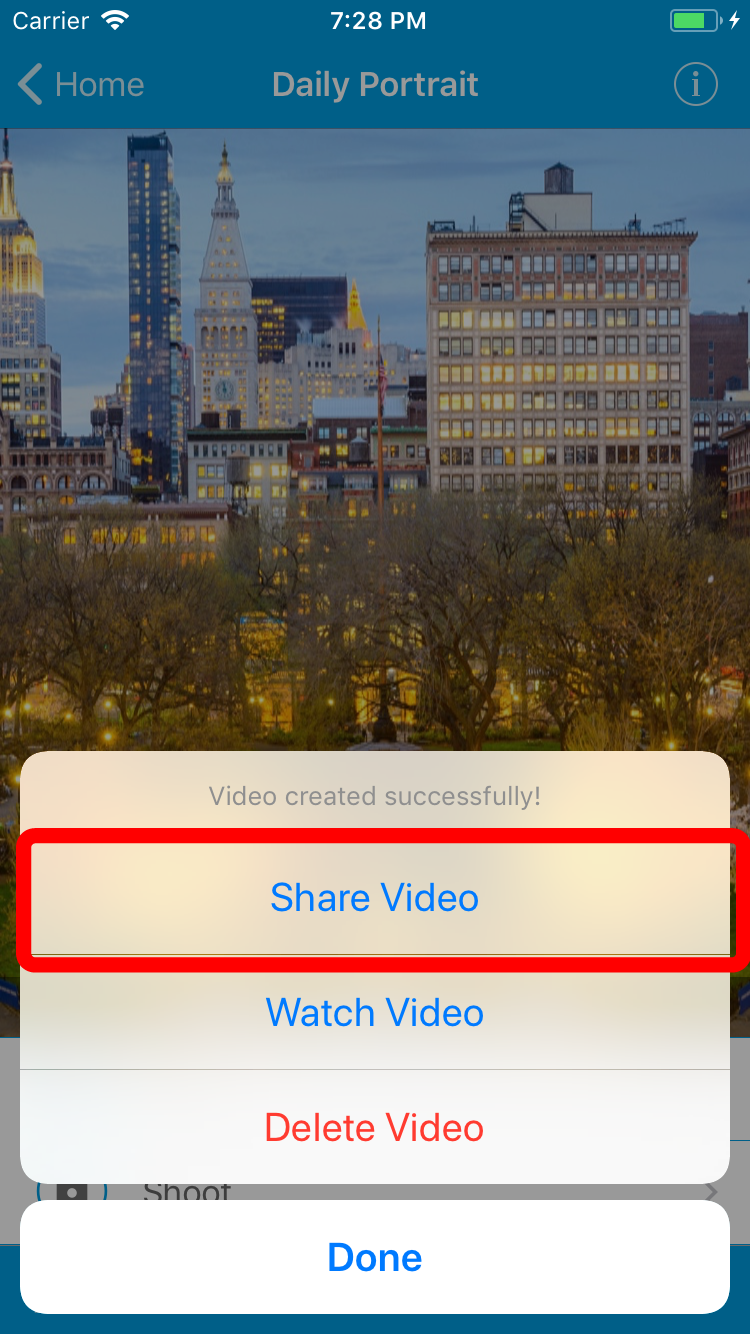
Step 2: Share Video
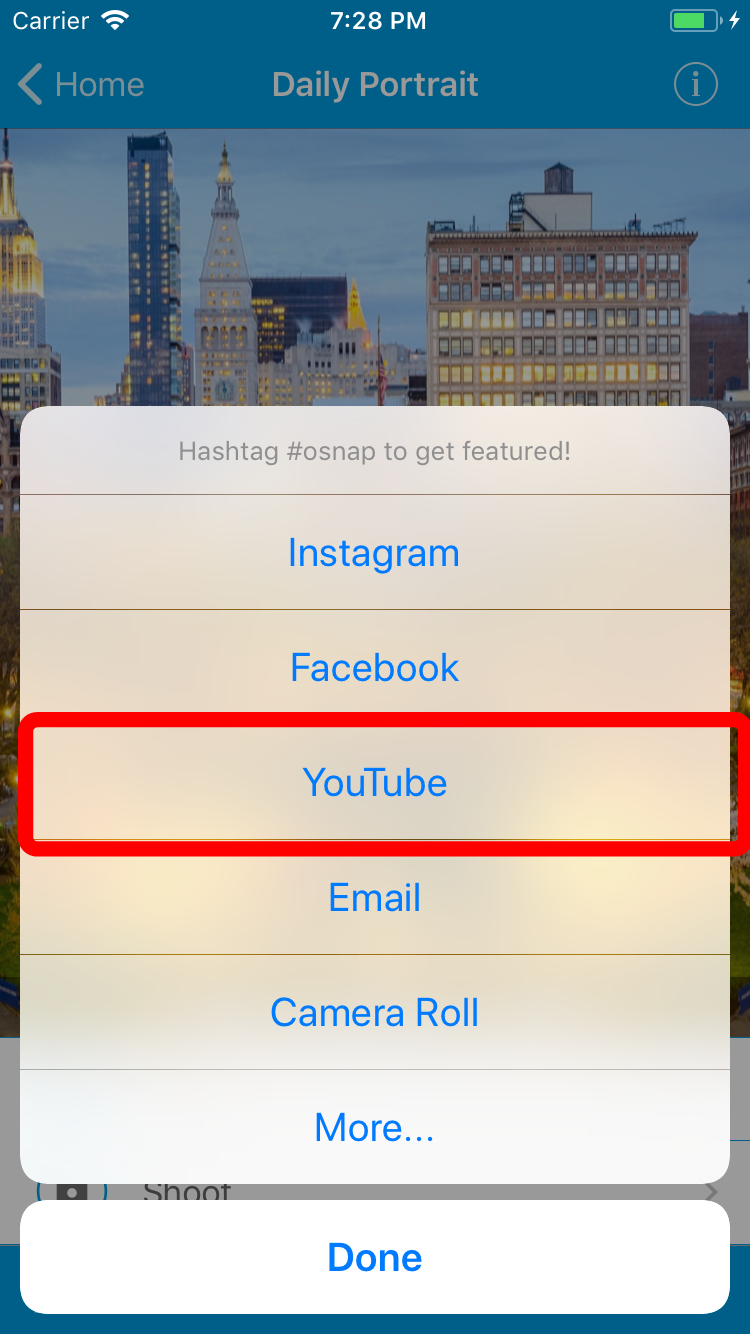
- Once your video is done rendering a sharing menu will appear. Let's assume you want to post your video to YouTube. Choose 'Share Video'. Another menu appears. Choose 'YouTube'
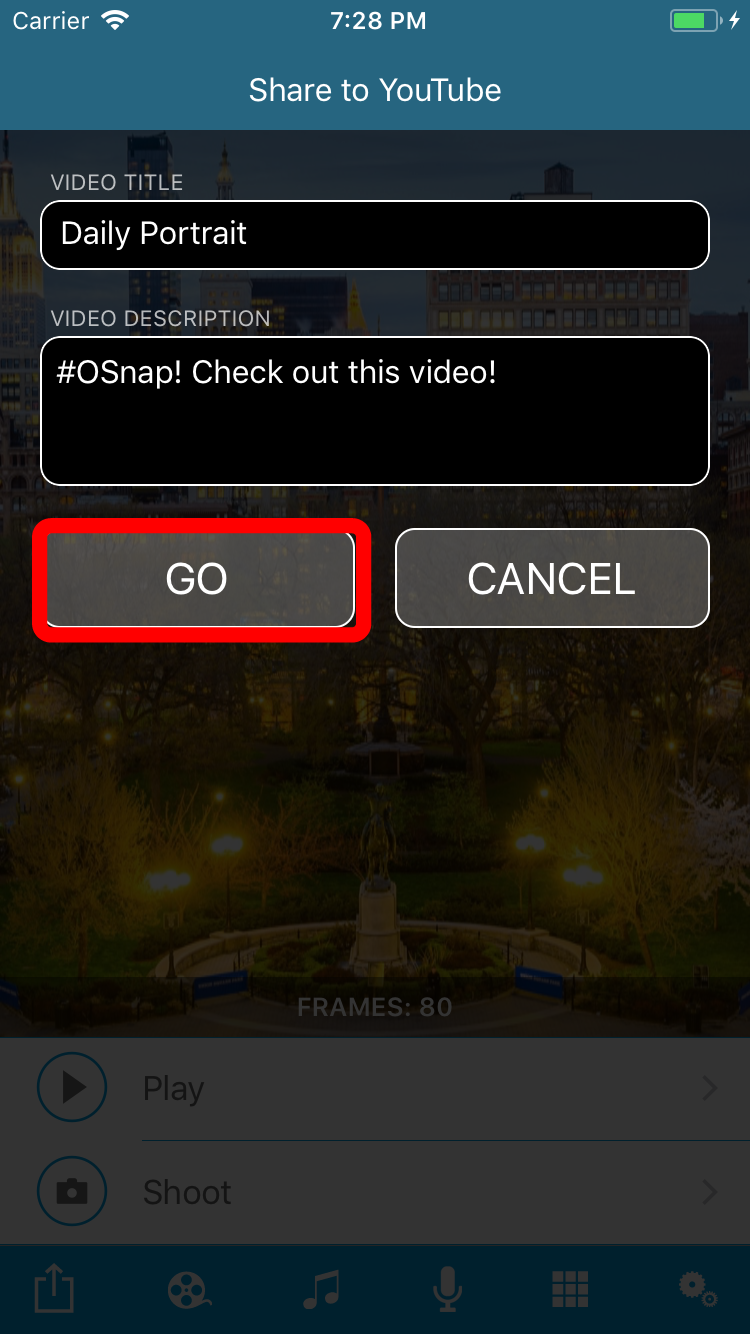
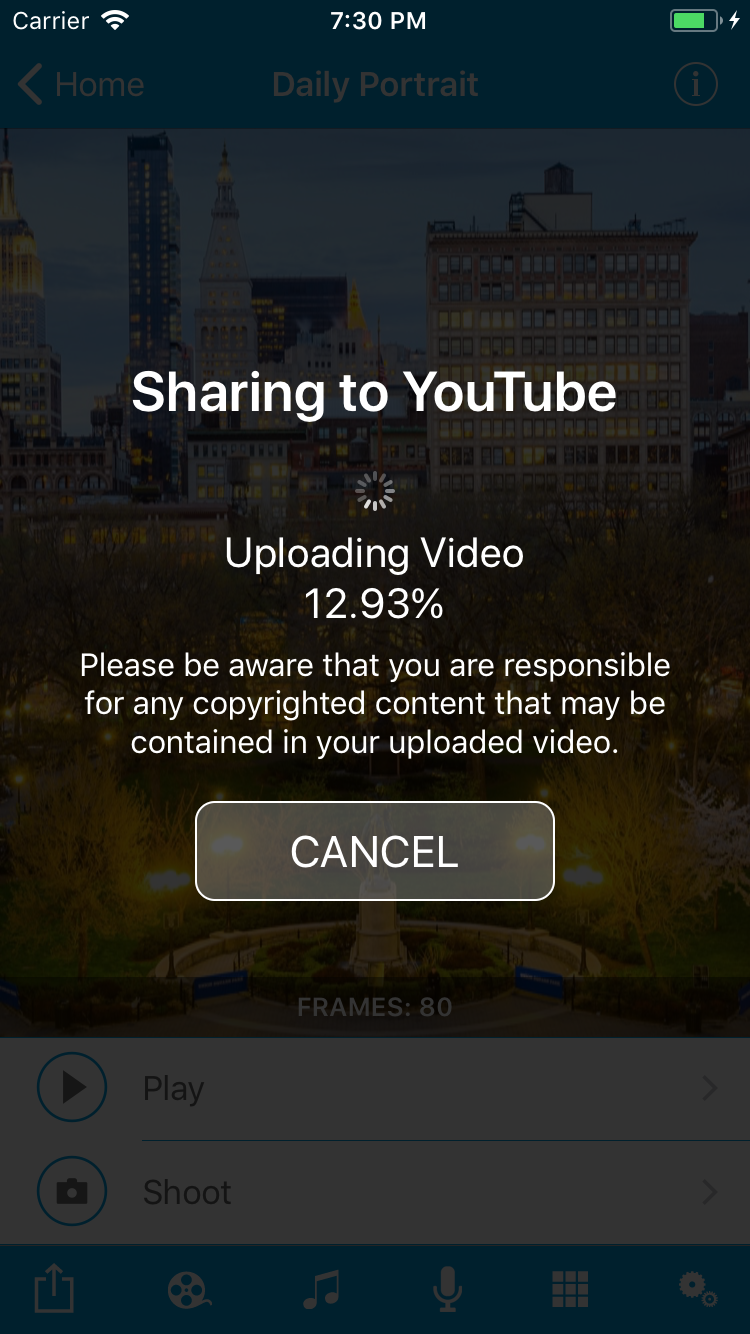
- Enter your YouTube user name and password as well as video title and description. When you are ready tap 'GO'. Your video will now be posted to YouTube! Congratulations! You have now posted your awesome time-lapse video to YouTube!